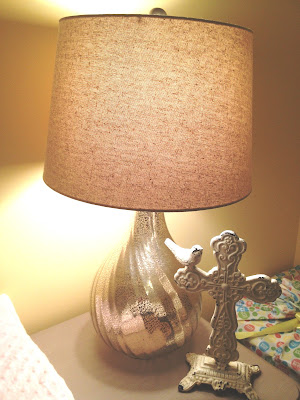
 If you've been on Pinterest for any length of time, you have no doubt pinned at least one felt flower tutorial to your "DIY" board. Am I right? Last weekend, I decided to ACTUALLY make something from my Pinterest DIY board (I know... impressive). I have been wanting to spice up a lamp for the nursery, so it was the perfect time to try my hand at felt flowers. All of the tutorials I found instructed me to use a hot glue gun to put the flowers together. FAIL. I don't know if my felt sucks or my glue gun sucks or both, but the hot glue method did NOT work for me. I burned my fingers and the flowers still wouldn't stay together. I scrapped the glue method all together and went old school with a needle and thread. Don't worry: I am NOT a seamstress. I'm still using the mini sewing kit my mom gave me when I graduated from high school. If you can thread a needle and make a lopsided stitch or two, you can do this. Promise.
You'll need:
Felt (I used cheap craft felt from Michael's)
Scissors
Needle & Thread
Felt Bloom Tutorial
Cut out a bunch of flower-ish shapes from your felt. I say flower-ish because mine were lopsided and uneven and you know what.... they turned out perfectly! They just have to sort of, kind of resemble flowers. I am lazy, so I folded my felt and cut three at a time. Pile 'em up. You'll need about 6 flat flowers to make one bloom. You might also want to cut a few small circles from the scraps. More about how to use those later.
Take a flower. Fold it in half once. Then fold it in half again. Hold it at the bottom like so.
Place your folded flower on a flat flower. Put it in one corner, knowing you're going to put four folded flowers on the flat flower. Hold the folded flower with one hand and stitch it to the flat flower with two or three stitches at the tip near the center. Your stitches don't have to be pretty or straight. Believe me, mine weren't. Repeat with 3 more folded flowers, sewing them on to the flat flower. Then, stitch all four folded pieces together with one stitch connecting each folded flower to the next in a little circle (a total of 4 stitches). Believe me, this is not difficult.
Now you need to fill in the middle. You can either use circles folded in half twice or smaller flowers folded in half twice. Repeat the folding and stitching procedures, stitching the smaller flowers in the center. Ta da!!
Now, take a break and cuddle with your curious puppy.
{Whatcha makin' mama? Something for Blazer, perhaps?}
Felt Rosette Tutorial
First, you're going to need to cut some strips of felt. Mine were about 2 inches wide. Use whatever color your heart desires. I used a taupe that kind of looked like burlap when finished, which I enjoyed.
Fold your long strip in half, hot-dog style. You're going to stitch down the open (non-folded) side. Start at the top and just stitch on down to the bottom. Your stitches need not be even, straight, or lovely looking AT ALL. They need only be there. As you stitch, pull the thread taut each time. This will begin to slowly gather the felt so that it puckers and begins to spiral. It's magical! When you get to the bottom of your strip, pull the thread tight one last time, tie off your stitches, and cut the thread.
As you see above, the felt will have already formed itself into a lovely spiral shape. Now you just need 3-4 stitches to hold it in that shape. You made a rosette! Lovely!
Next, get something good on the DVR. Repeat all these steps. And repeat again.
Congratulations! Now you have a whole mess of THESE beauties!
Now's the really fun part. Get out your glue gun and go to town! What needs a rosette in your house? A lamp? A pillow? A picture frame? A headband? All of the above? Go for it. I used mine on a lamp for Baby N's room.
Before:
After:


