
 As much as I'd like to, I can not take credit for this no-recipe favorite. I heard about these chicken kebabs by browsing the blog of a friend-of-a-friend, Annalee. You know how that works. I love reading about her cute kiddos and her busy mom strategies. I'm not a mom, but I'm busy, so I appreciate her tips and recipes. You should check out her blog here.
These chicken kebabs are slightly more labor intensive than the other no-recipe recipes I've posted due to the chopping and skewering. However, there is something strangely calming about putting these together. The last time I made them Brent said, "You're having fun, aren't you?" Well, yes, add a glass of wine and I'm having a blast! In all reality they are pretty quick. They also get you a good dose of veggies, are very versatile, and have a pop of decadent flavor with the addition of a little bacon. Everyone knows bacon makes anything better. Finally, the unique spice rub you sprinkle on top gives this dish a special touch. Annalee advertised it as a "no grill" meal that tastes like it's fresh off the grill. It's totally true. Love it!
Step 1: Chop up your ingredients of choice into small bites. Put each chopped ingredient in a separate bowl for easy skewering later. I use: whole mushrooms, bell pepper, jalapeno pepper, and chicken breasts. You could also use pineapple, squash, zucchini, cherry tomatoes, asparagus, pork, shrimp... I mean really anything.
Step 2: Cut a few pieces of bacon in half. Wrap half of your chicken pieces in bacon. I like to wrap only half of my chicken pieces so I have that bacon taste but I don't go overboard. The plain chicken pieces are delish, too.
Step 3: Get artistic and skewer your ingredients however you'd like. I'm a bit OCD so I like to follow a pattern: mushroom, bell pepper, jalapeno, chicken. Sometimes I get crazy and put two mushrooms in a row. You can use metal skewers like I have or you can buy wooden ones at the grocery store for like $2. Drizzle the completed skewers with a little olive oil and Kosher salt.
Step 4: As you finish the skewers, place them across a rimmed cookie sheet so that they are not touching the bottom of the sheet (see picture below). This is important because you want the veggies and chicken to get crispy and brown. They will get really juicy while cooking, so laying them across the cookie sheet lets you collect the liquid without letting your kebabs get soggy.
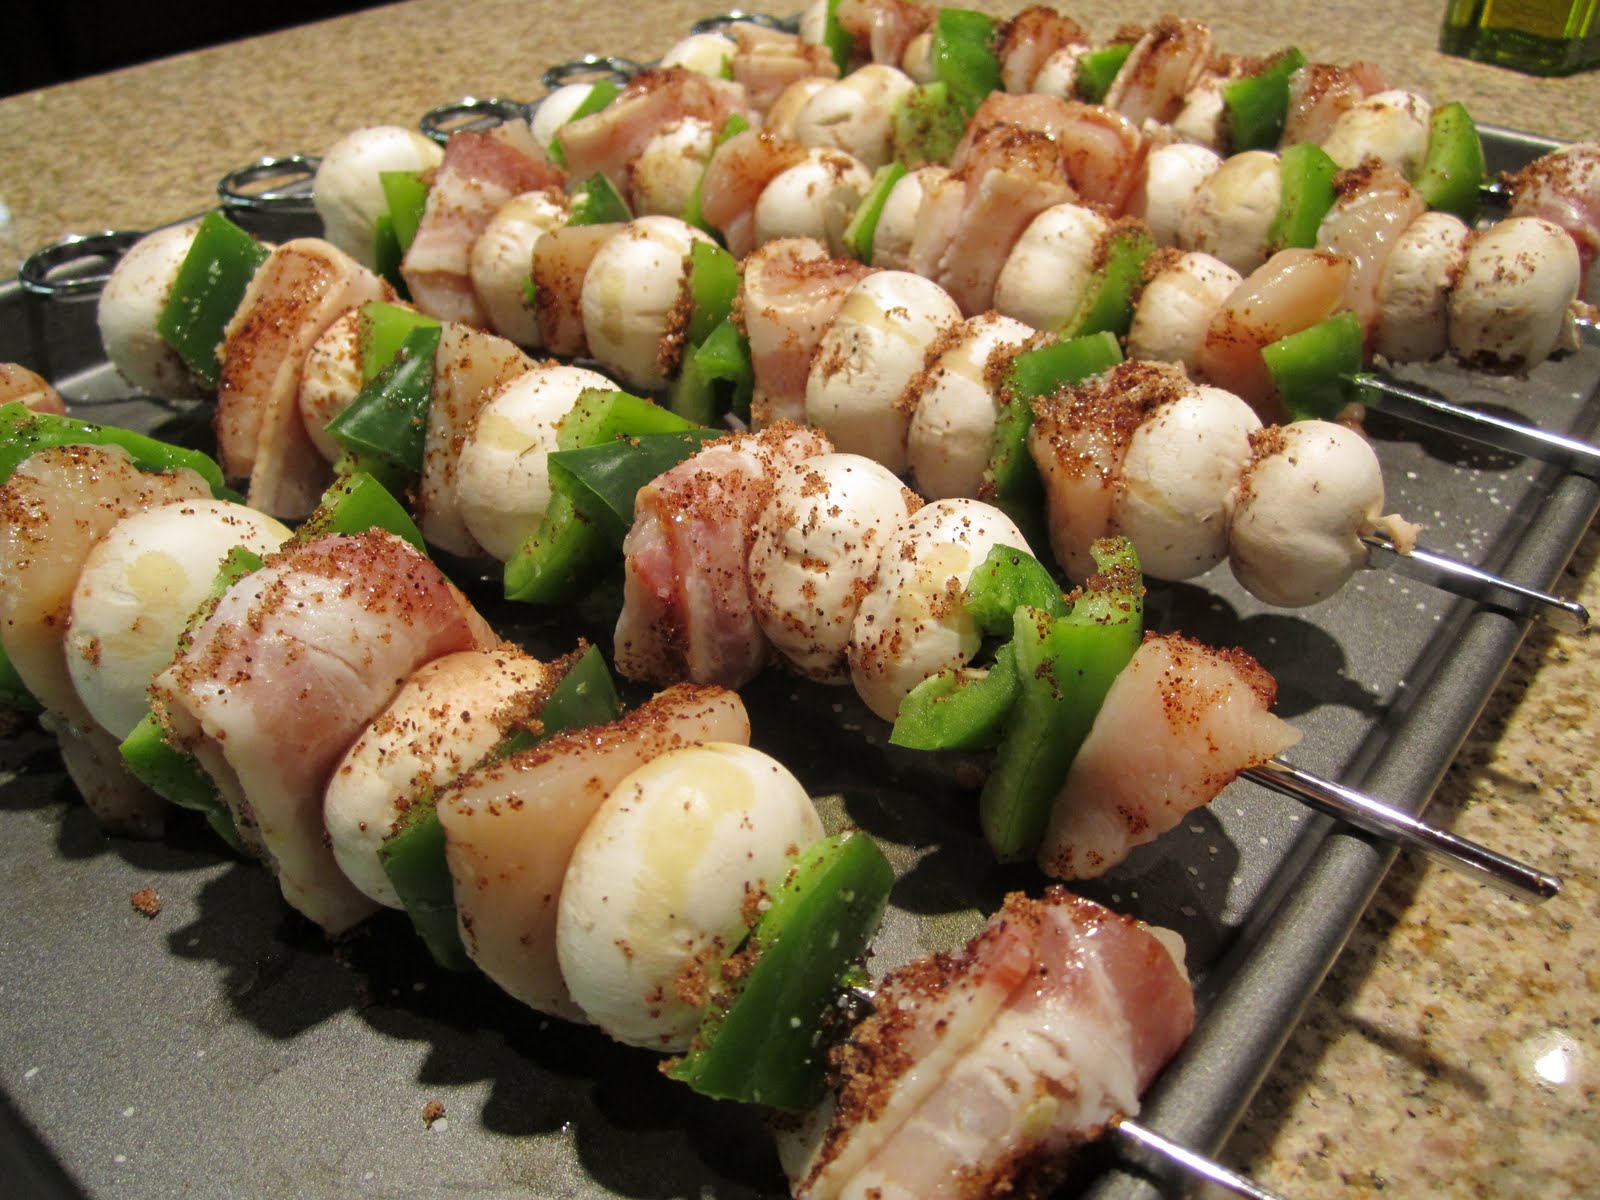 Step 4: In a small bowl, mix equal amounts of brown sugar and chili powder. Sprinkle liberally over all the kebabs. I like to spin mine around so the chili/sugar goodness gets all over. This spice mix gives the kebabs a great color and a spicy/sweet kick once they're cooked. You can't skip this step. It's pretty important.
Step 5: Cook in the oven at high heat (I think I use like 410). Watch it and cook just until chicken is opaque. Then, turn the broiler on high for five minutes or so to crisp up the bacon and finish roasting everything else.
Step 6: Remove from oven and serve! They are really good with a small baked potato. And, like all good no-recipe meals, they are FABULOUS left over.


2 comments:
Those sound yummy! I can't wait to try them! :-)
I would, however, like to add a disclaimer for those who might not be as used to kebabs as you and I are:
If you buy wood skewers, you have to soak them in water first, so there's no splintering!
That's just one lesson that's too painful to learn the hard way!
Thanks Erin! I have actually burned wooden skewers to a crisp before, so I should have included that in the directions! :-)
Post a Comment